
fno.org
|
|
| Vol 17|No 3|January 2008 | |
| Please feel free to e-mail this article to a friend, a principal, a parent, a colleague, a teacher librarian, a college professor, a poet, a magician, a vendor, an artist, a juggler, a student, a news reporter or to anyone else you think might enjoy it. | |
Beyond PowerPointBy Kendra GrantAbout author Tired of student presentations that showcase the medium over the message? Read on to discover how Inspiration(tm) can be used to create a variety of presentations to suit different activities and different learners. |
 |
|
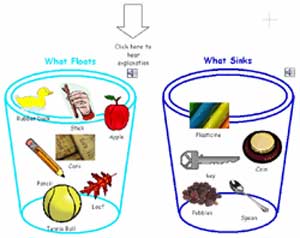
This past June, I had the good fortune to attend Jamie McKenzie's 3 day workshop in Atlanta, Georgia. While in attendance Jamie asked me to show the participants some of the ways I use Inspiration as a presentation tool. The following is a description of the techniques I demonstrated. What is Inspiration™?Inspiration is a unique software tool. When anything is developed in the diagram mode (whether it is a web, flowchart or writing framework) a written outline is simultaneously created. This integrated format allows the teacher to plan, organize and structure almost any learning task. In addition, Inspiration provides "multiple means of representing, expressing and engaging"1 with information through such features as embed sound and video, a million symbol database, note pads, hyperlinks, listen feature and record tool. Inspiration is the definitive universal design tool: supporting students as they brainstorm ideas, organize their inquiry, develop written responses and present their findings. Inspiration as a Presentation ToolBelow are several suggestions for using Inspiration as a presentation tool. This includes "Store Front" presentations, "Gradual Reveal"2, Note Pad Showcase and Hyperlinking.* Pairing Inspiration's unique presentation alternatives, with a focus on real world problems and higher level thinking, will help to engage both the learner and their audience. 3 Inspiration supports creativity and interactivity in a way that opens up presentations to learning beyond mere presenting. 1. Store FrontStore Front presentations are simple one page overviews in which symbols and limited text are supported by recorded sound files to explain thinking.
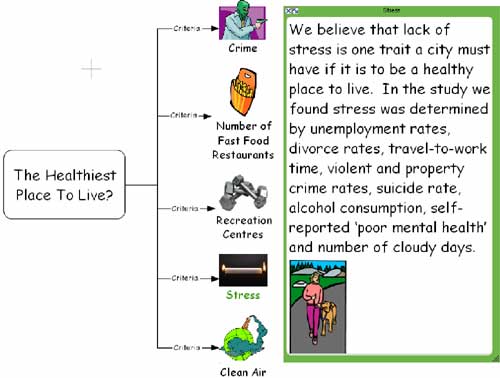
Why Use: This type of presentation helps students summarize their ideas within the confines of a single page. It is an excellent way to provide an alternative to a written assignment as students must analyze and synthesize information in order to create their summary, yet they are not overloaded with written output demands. It is also a good accommodation for those students, due to anxiety or speech difficulties, who find oral presentations daunting. How to Present: To present to a group, click on the "Record" icon for each symbol and listen to each idea. Store Fronts can also be viewed without the need of a formal presentation. Depending on how many computers are available, open several different presentations and have individuals or partners move from computer to computer listening and responding to each person's presentation. Alternatively, open one presentation on several computers and have students respond as a group. 2. Gradual RevealGradual Reveal is a means of presenting where the content is shown or revealed incrementally. It can be used by both teachers and students and works very well with any sequential activity such as a timeline or flowchart.
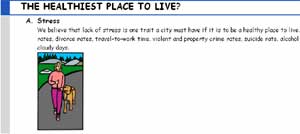
Why Use: This type of presentation helps to ensure an audience focuses on each idea as it is revealed. It allows the presenter to control the information and helps maintain attention and interest. When presenting complex or detailed information, gradual reveal doesn't overwhelm the learner with too much visual information at one time. For students learning to take notes in a lecture format, it provides them with the main ideas to begin each segment of their note taking. How to Present: To present, reveal each step by clicking on the "show subtopics" arrow and/or the "show note" icon. Discuss each idea before moving on to the next symbol where the process is repeated. 3. Note Pad ShowcaseNote Pads make simple but effective presentations. They are easily altered in size, are moveable, and images can be quickly added. By opening and closing note pads to present information, they in effect become mini screens.
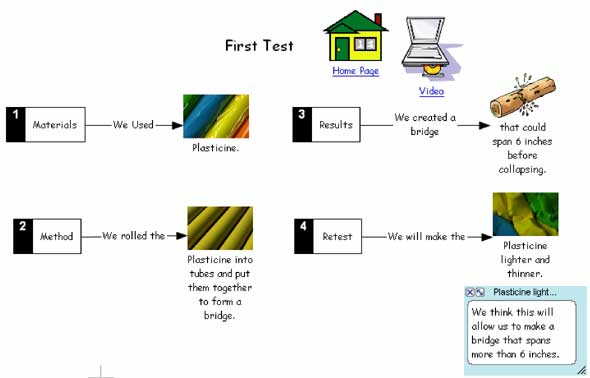
Why Use: During a presentation, note pads help focus attention on the idea being presented as only one "window" is open at a time. Once finished, the presentation can easily be printed in its outline form. How to Present: To present, click on the symbol, then click on the note pad icon to open the note pad. The note pad will open to the size and location previously set before closing. After the information is presented, close the note pad and choose the next symbol. 4. HyperlinkingHyperlinking takes two different forms. The first is a "site map" presentation much like a web page where all pages return to the home page. This type of presentation helps the presenter stay on track as they present each topic from their home page. The second type of hyperlink presentation is created in the same manner as the "site map" but rather than linking to a home page each page hyperlinks to the next in a linear format. A combination of the two can also be developed. On each page in the presentation, hyperlinks to web pages, video and other files on the computer such as Word or Excel can be added to enhance the presentation. Examples:
Why Use: The flexibility of this approach is the presenter can actively use Inspiration throughout the presentation - sort ideas, create a diagram, watch a video and then create a sequential organizer of the information it contains - rather than presenting a "static" presentation where everything is set. How to Present: To present, click on the hyperlink to go to the next page. Then click the "Home" hyperlink or the "Next" hyperlink depending on the style of presentation. Beyond PowerPoint™ Inspiration™ is a unique tool to help structure student's thinking, learning, writing and presenting. There are a variety of ways students and teachers can use Inspiration to present information. Beginning with the basic "Store Front" students learn to use their recorded voice to enhance their presentation. Gradual Reveal and Note Pad Showcase, keep information contained, allowing the presenter to slowly reveal the information rather than display it all at once. Finally, Hyperlinking allows the user to create interactive presentations similar to web pages. In fact, these types of presentations can easily be turned into html with a click of a button. Inspiration is a valuable tool for all learners of all ages. Beyond organizing and structuring ideas, Inspiration supports the presentation of those ideas. Explore the possibilities for yourself and with your students. 1 Teaching Every Student in the Digital Age by David H. Rose and Anne Meyer - http://www.cast.org/teachingeverystudent/ideas/tes/ 2 John-Jacques Serre - Strategic Transitions, Inc. - www.strategictransitions.com 3 Go to http://questioning.org to learn more about questioning (c) Kendra Grant and Strategic Transitions, Inc. 2007 |
|
|
Copyright Policy: Materials published in From Now On may be duplicated in hard copy format if unchanged in format and content for educational, nonprofit school district and university use only and may also be sent from person to person by e-mail. This copyright statement must be included. All other uses, transmissions and duplications are prohibited unless permission is granted expressly. Showing these pages remotely through frames is not permitted. |
|


Info